Every now and then my workroom floor gets completely covered with crafting paraphernalia while I make some books. By that I mean either plain journals where I just decorate the cover, or complete wedding guestbooks where every page is decorated with places for the guests to sign their name or leave a message. Well this has been the case for the last couple of weeks. At the moment I’m making a large steampunk themed guestbook, which, when finished, will be an example for others that can be made to order with the couple’s names and wedding colours etc. So, I thought I’d tell you how I age my paper to give that lovely distressed vintage look….
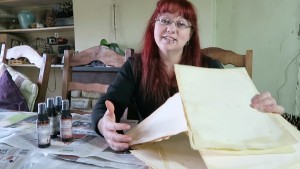
I actually usually start with good quality card, like this pack:
although I mix my pages up and use a few different sorts. If you’re making a book with loads of pages, using card can get too expensive, so ordinary paper will work too though cream will look a lot better than white and you have to be very careful not to tear the paper when it’s wet.
I start by using this tool from Spellbinders, and it is definitely one of my favourite craft purchases ever. Yes, you could use sandpaper, but this tool is less rough on your skin. You simply wipe it along the edges of your card, using either the blade or the rough bits on the sides. It softens the edges and sometimes it catches and tears slightly – the effect of which I really like.
Now, the next stage I used to do with brown watercolour paint and a sponge, but I recently
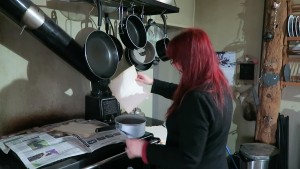
discovered this is much quicker: Then you make a cup of tea for everyone in the family and pop all the used teabags in a saucepan and add some boiling water, about 3cm deep. (You could use coffee, but it leaves a stronger smell that not everyone may like.) Then you curl the card round till it fits in the saucepan, and dunk it! Have some newspaper at the ready to lay the wet card onto. Just repeat till all the edges are done. You can also flick the tea about for splatter effects. I also don’t mind it smudging onto other pieces of card if you’re stacking them up. You’ll have to take more care though if you want a neater finish.
I dry the card on top of the oven. It will curl and crinkle anyway, but for some reason the oven heat gives it a crisper, more aged feel. Then I spread out all the card side by side and use my Imagine Crafts ink sprays. I love these! There are four different colours and they do go a long way. A bottle will last for ages and if you spray at a distance of about 40cm, you will cover about 4 A4 sheets at once!
You can go close-up for more intense colour if you like. I also like blending the inks a bit and layer one colour over another. And voila! you’re done! Be warned – this spray goes a long way outwards too. If you don’t want to cover your lap and your desk and your cat in ink; cover everything with newspaper and stand back! Also, shake well and spray confidently – if you’re shy about it, the ink will dribble. Again, I like that look, but this is not the equipment for you if you want precise, accurate results.
It isn’t a disaster if you realise at this point you forgot to use the distressing tool first, but as it probably will reveal some of the original card colour, rather than the tea stained colour, you may want to go over some bits again with a stamping ink pad, like this one.
This is a quick method. If you have a bit more time, you can do things like wetting the card completely and scrunching it up and sprinkling tea or coffee grains on it. That’s a cool effect. Just have a play till you get the results you like. Click on the pictures of the items I used if you’d like to have a go. Please let me know how you get on or if you have any tips you’d like to add. Thank you!
If you’d like to watch my you tube video of me ageing paper and card, please get yourself a cup of tea and have a little watch. If you like it, please give it a thumbs up and subscribe to my channel if you’d like to see more 🙂


