

I watched back the September Favourites You Tube video I made, and I don’t think my tone of voice was sarcastic enough when I said that next time I’d be in the bedroom with a white headboard with fairy-lights and a vase of flowers and candle in the background! (This seems to be the setting of 99% of monthly favourites You Tube videos.) When I made that video we had no headboard at all; flaky plaster; holes in the ceiling and a lot of mess. Last weekend though, we got busy in the bedroom(!)…..
About four or five years ago we treated ourselves to a fu***ng expensive bed. We’ve always had sh*t beds and they’ve always break and we end up with just the mattress on the floor. Well this time, we decided to buy ourselves a decent one that’s going to last. Well it has to last now because we had to make a hole in the ceiling to get it up the stairs. Admittedly, we haven’t fixed the hole yet, but hopefully it will be fixed soon, and then the bed isn’t coming down those stairs again! Anyway, Chris said right from the start that we’d buy an ordinary divan bed, and he’d make a cool frame for it.
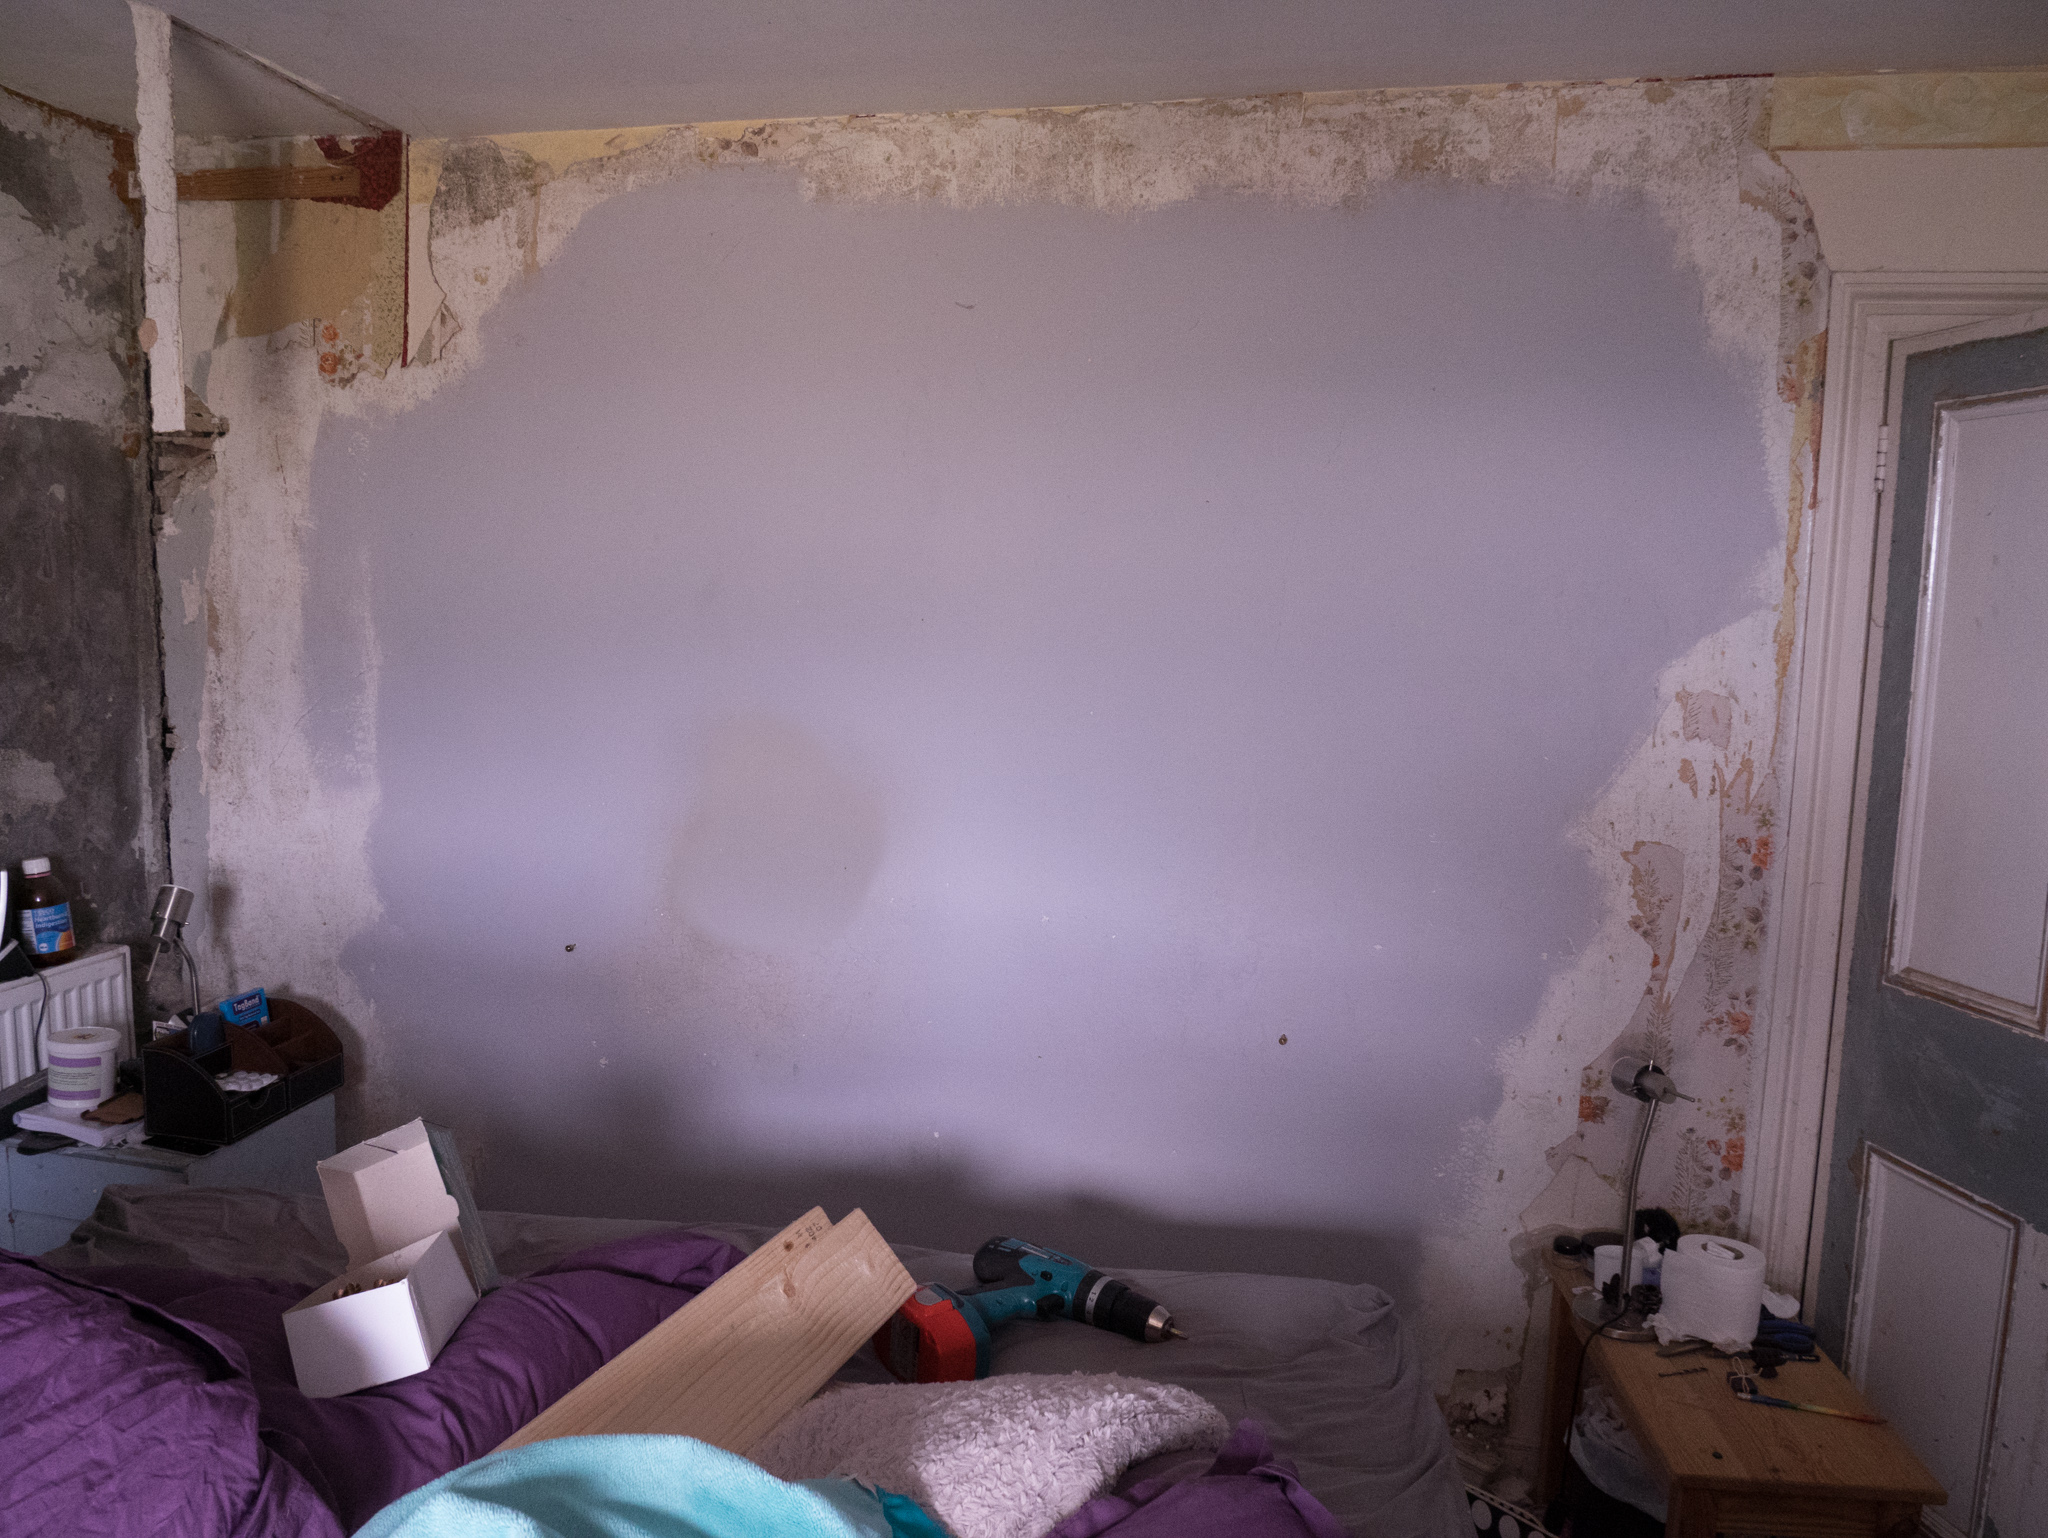
The wall
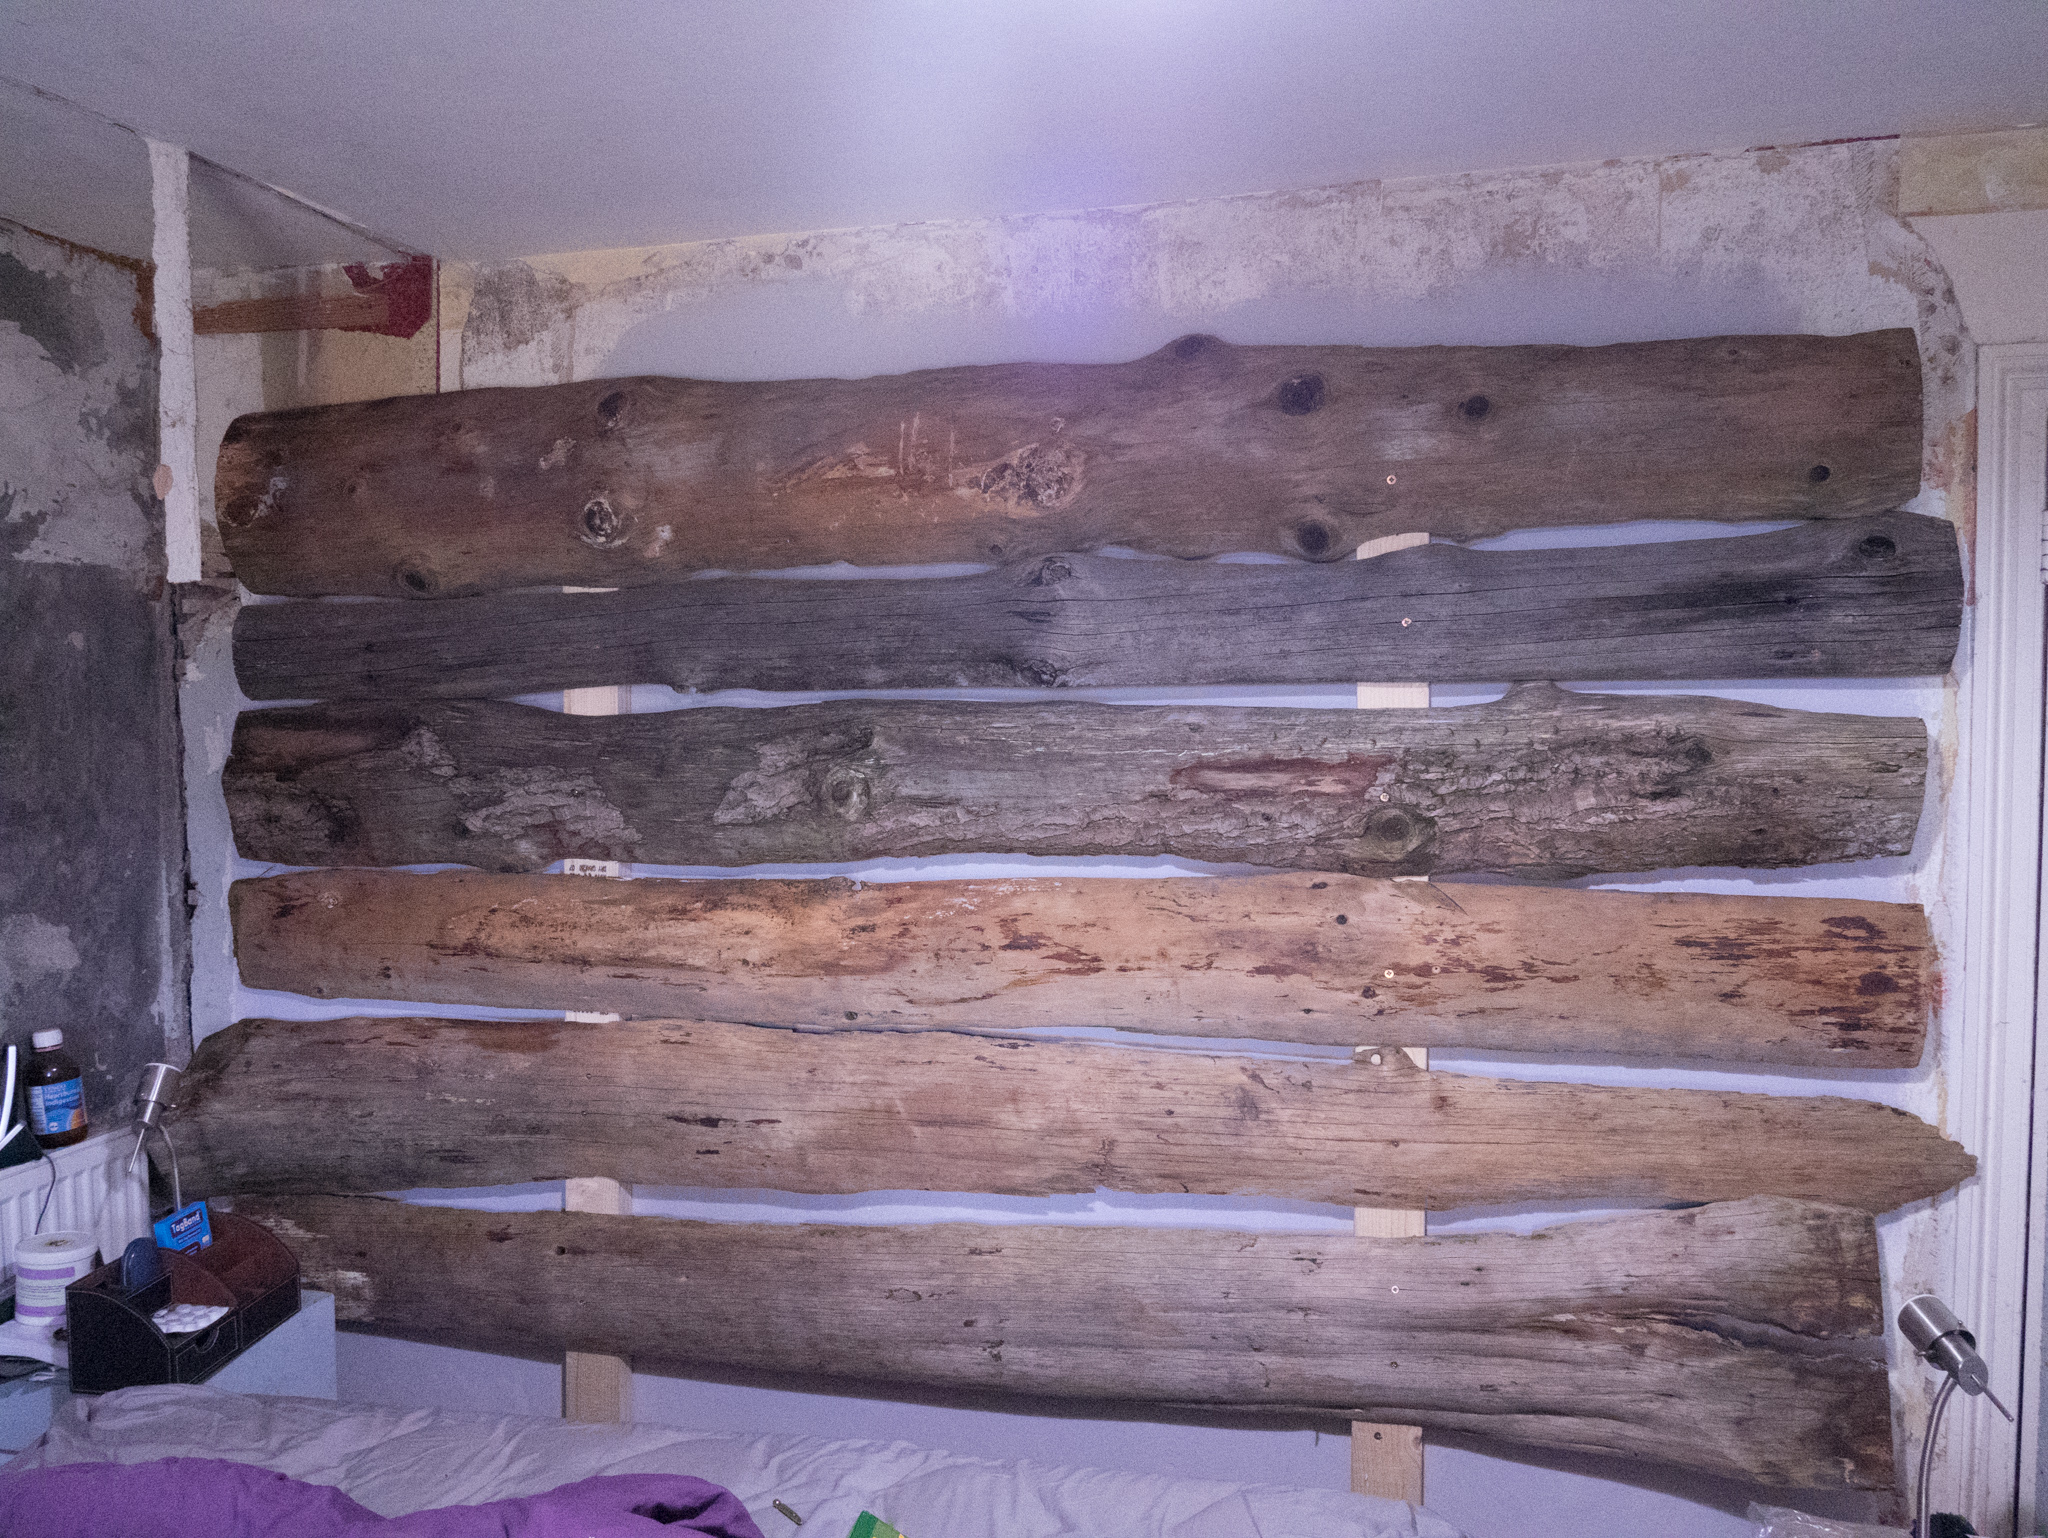
In the end, we decided not to have a frame because our last bed had a wide frame that I always scraped my shin on as I spritely jumped in and out of bed. (Again; if my sarcasm isn’t obvious – I’m joking. I generally fall into bed at the end of the day and drag myself out of bed at the beginning.) So we planned a statement headboard instead. This is probably the most environmentally friendly headboard ever. The wood is discarded from a nearby sawmill and given (or possibly sold – I don’t know) to Glastonbury Festival. Thousands of these offcuts are used as fencing between stalls and clever bits of furniture made by volunteers. Anything that isn’t used is available for bonfires. (Not that there is any room for campsite bonfires any more.)
Passes that allow vehicles into the festival site are like gold-dust, but a friend of ours who volunteers every year has one, and a couple of days after the festival was over, he kindly loaded up a trailer as he knew we wanted some of the leftover wood. Along with random pieces, we also had a very nice bench that we sat on at the back of the house until it fell apart. We rummaged through the pile of wood (although a fair bit has already been used in other projects about the house) and picked out the best pieces from that and the bench and laid them out on our garden table until we felt we had the best arrangement.
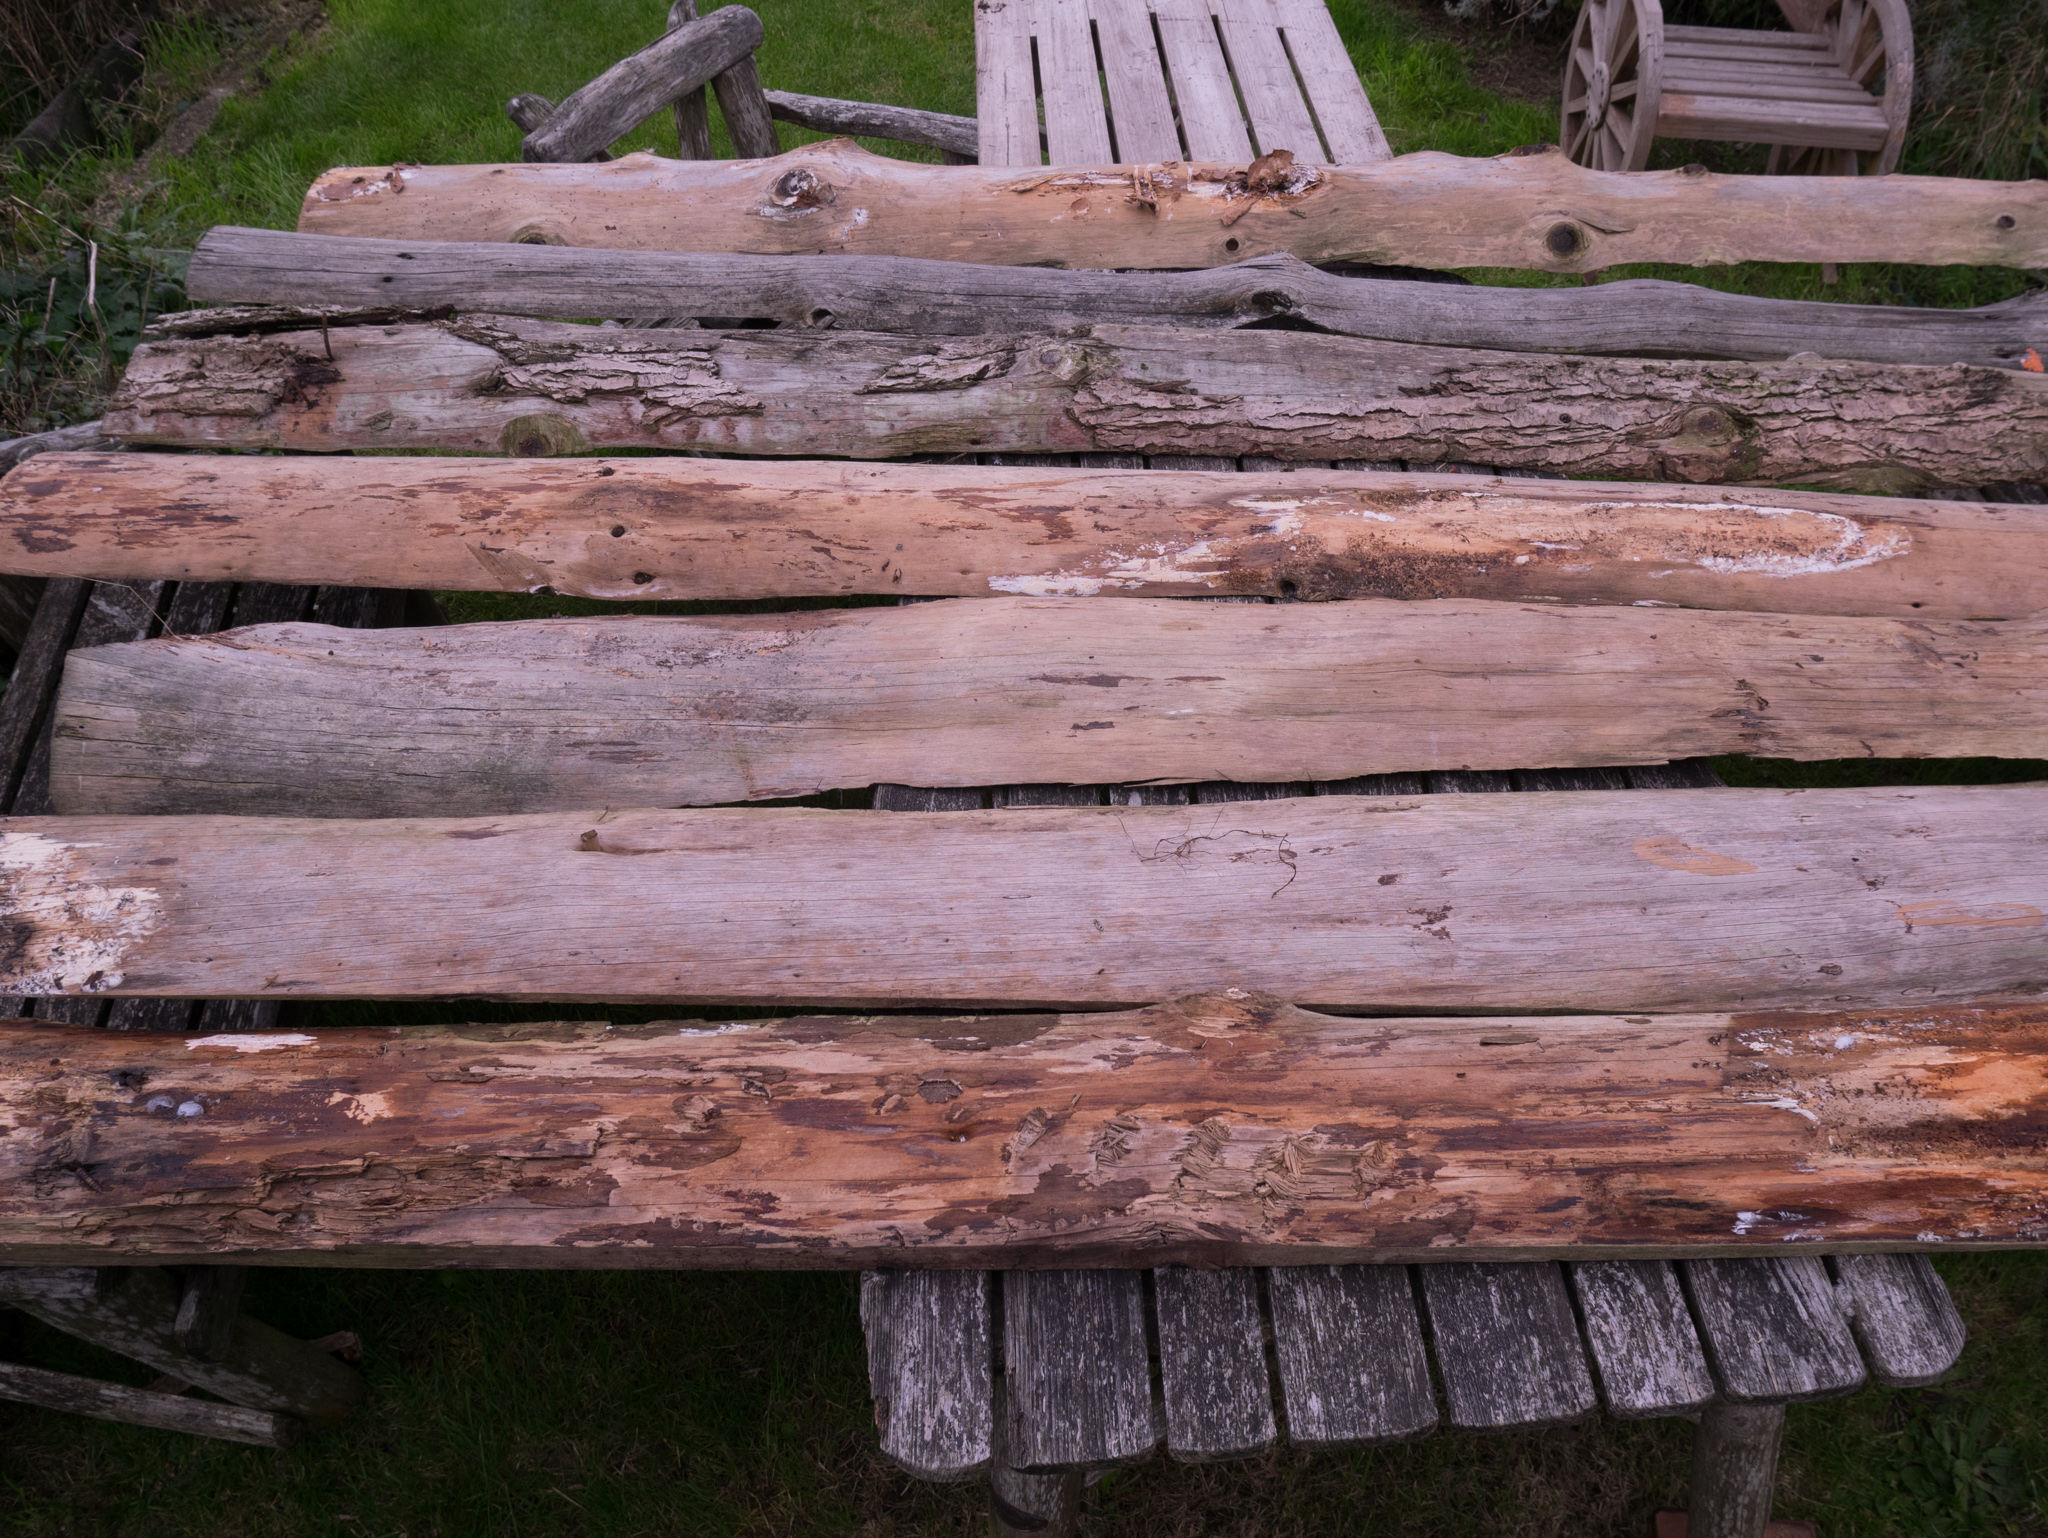
Reclaimed wood
The next task was to find the studs in a Georgian lath and plaster wall. Somewhere; goodness knows where, we have a stud-finder, though even if we could find it,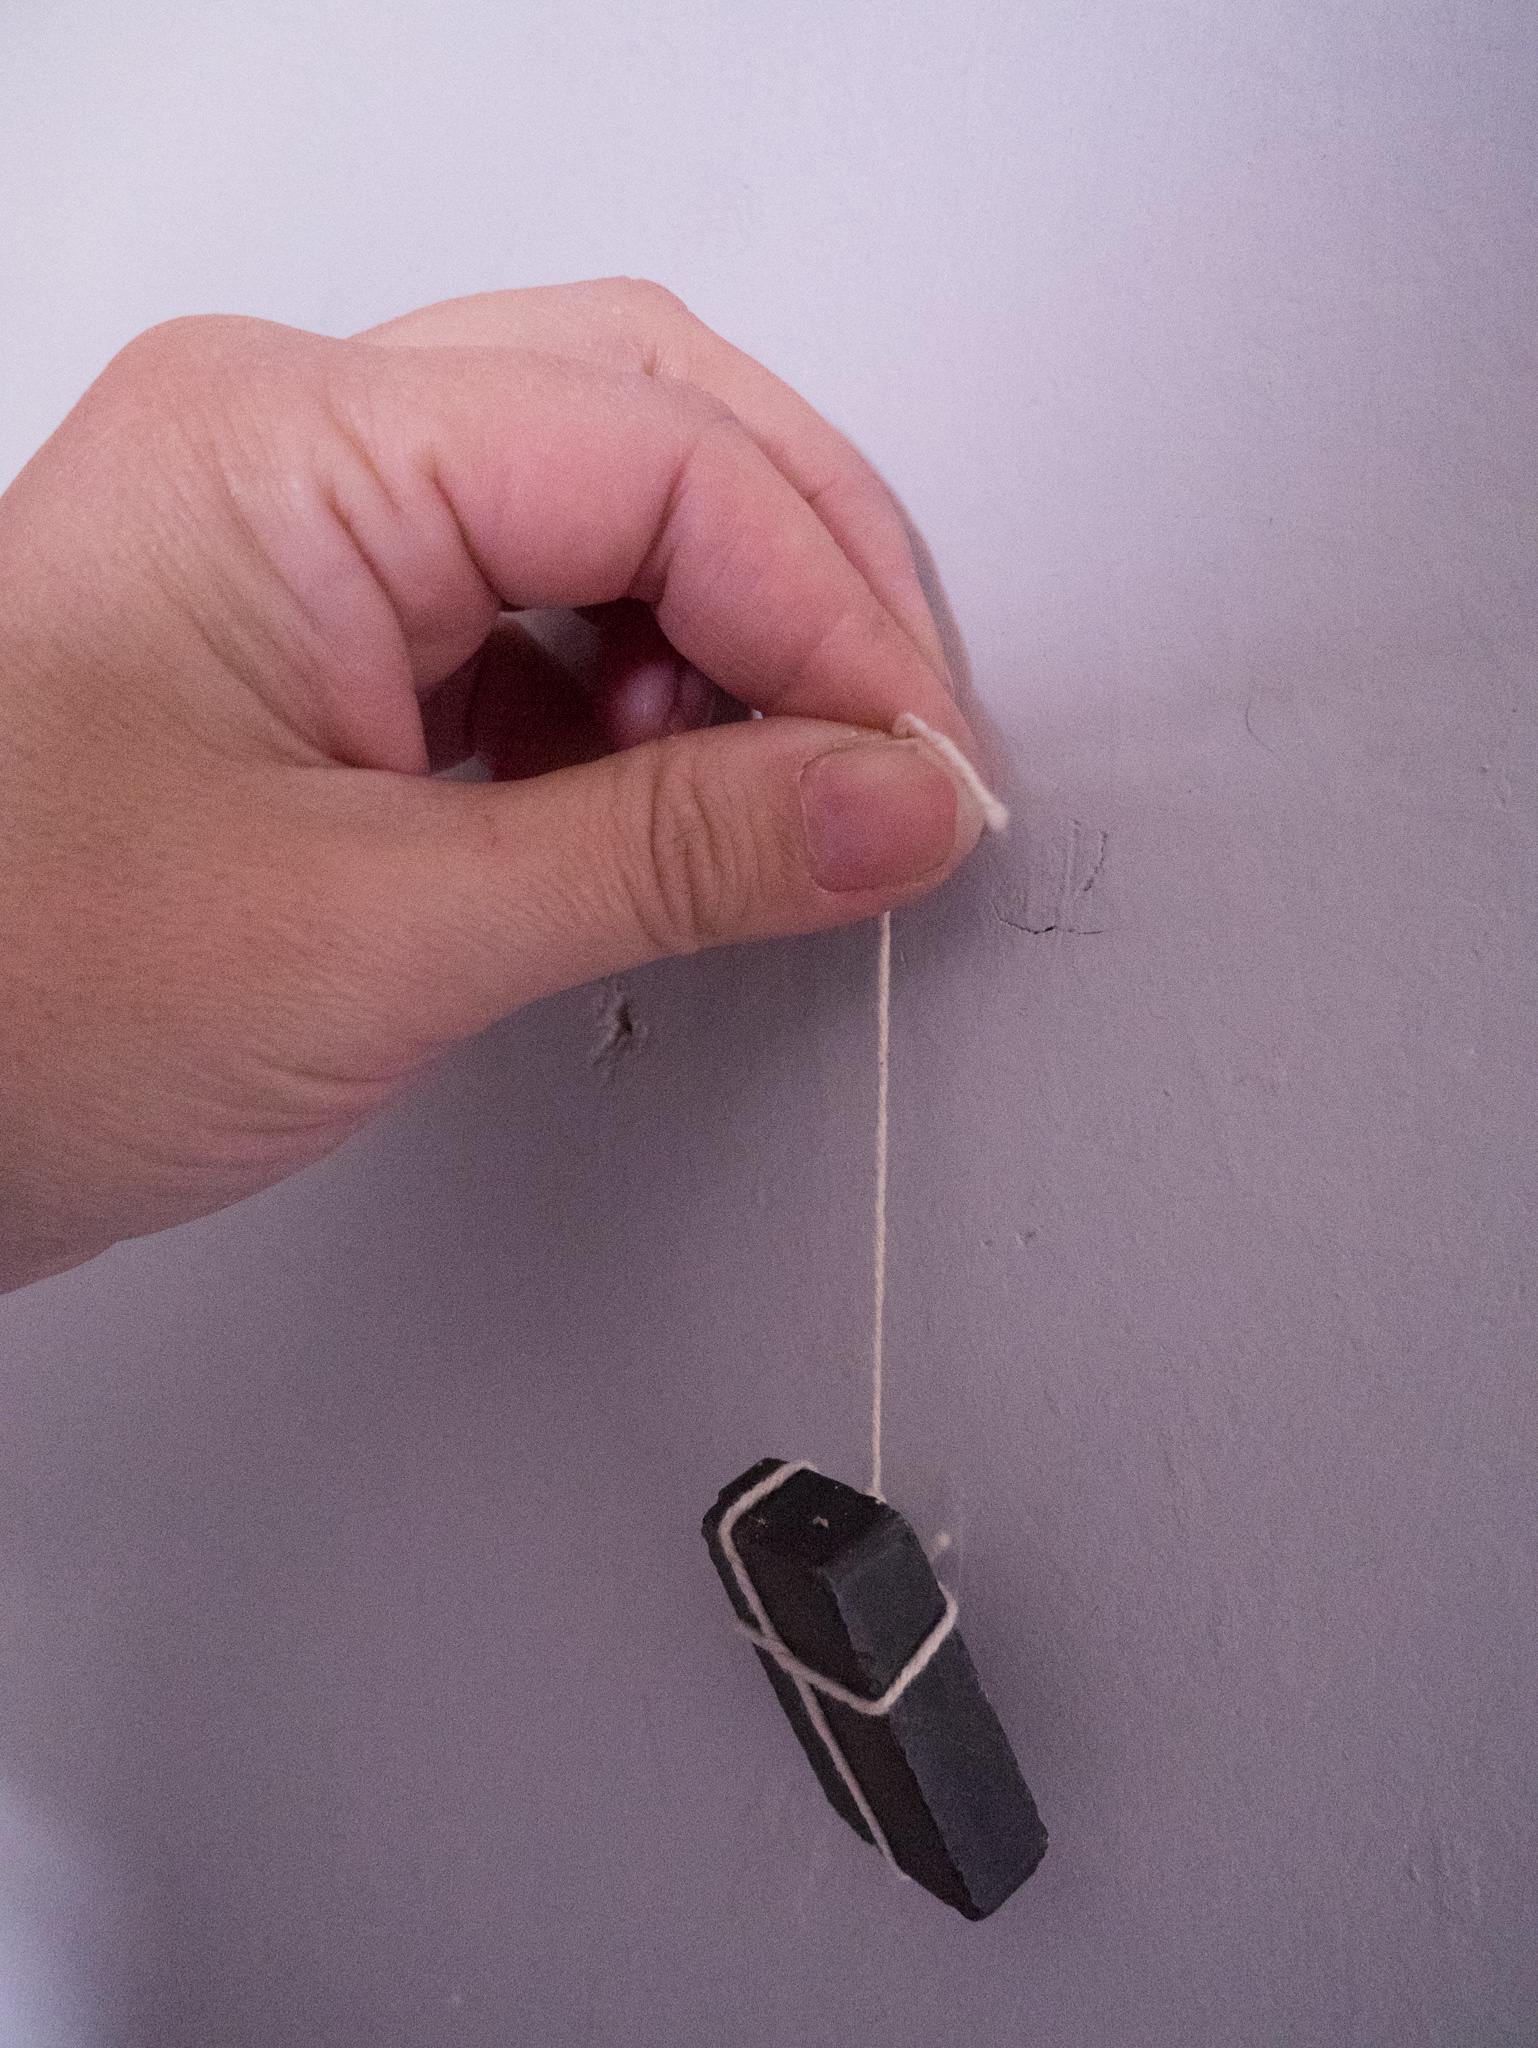 we read on the internet that they’re useless in old walls like ours. The best advice came from this website, where we learned about dangling a strong magnet and moving it slowly along the wall until it pulled towards all the nails in the stud. It took some time and patience, but in the end, I was fairly confident that I had a very slight reaction in a couple of places, and lo and behold, on drilling into the wall, I was dead on first time. I was just as surprised as Chris was! The plaster is very thick and I could’ve just wobbled slightly when holding the magnet, but very glad that the method worked. We did have to buy two pieces of new wood to be our upright pieces.
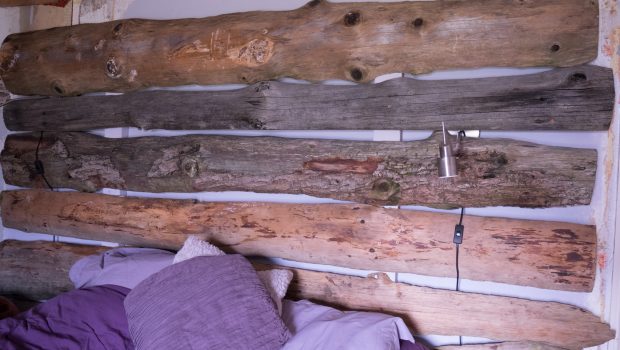
Then, after a quick clean, de-nailing and insecticide treatment, we lugged the off-cut planks upstairs and I held them in place while Chris screwed them on. And voila! New headboard. My next task was to very carefully paint the new pine that showed between the planks. I’d painted the wall when got the bed in anticipation of needing it done before the frame or headboard was built, and the colour, if you’re interested, is Calluna by Farrow and Ball. We’ll also make up some wood filler to hide the screws.
Building a headboard
So as you can probably tell, there is still a lot more work to do in the room. I wasn’t joking when I talked about holes in the ceiling, and there’s a fairly large gap between where the floor ends the outside wall begins, so that’s a little worrying! So I titled this Part one, but I’ve no idea how many parts are to go. Here’s a little list of what we’d already done before this: Taken out the 1960’s built-in furniture; scraped off most of the layers of wallpaper; scraped off the layer of polystyrene that was keeping the wall damp; taken out the carpet to reveal the Georgian floorboards; taken off the plywood that was covering the Georgian door; bashed a hole in the wall to see what state the fireplace was in (and stuffed an old pillow in it to stop the draughts and the cat escaping).
During the same weekend Chris put up a rail between the chimney and the wall and his t-shirts and shirts are hanging there now. The portable Ikea wardrobe he had been using has a new home in the guest room, and the old chest of drawers is sitting in the lower garden waiting for bonfire night.
Almost finished rustic headboard
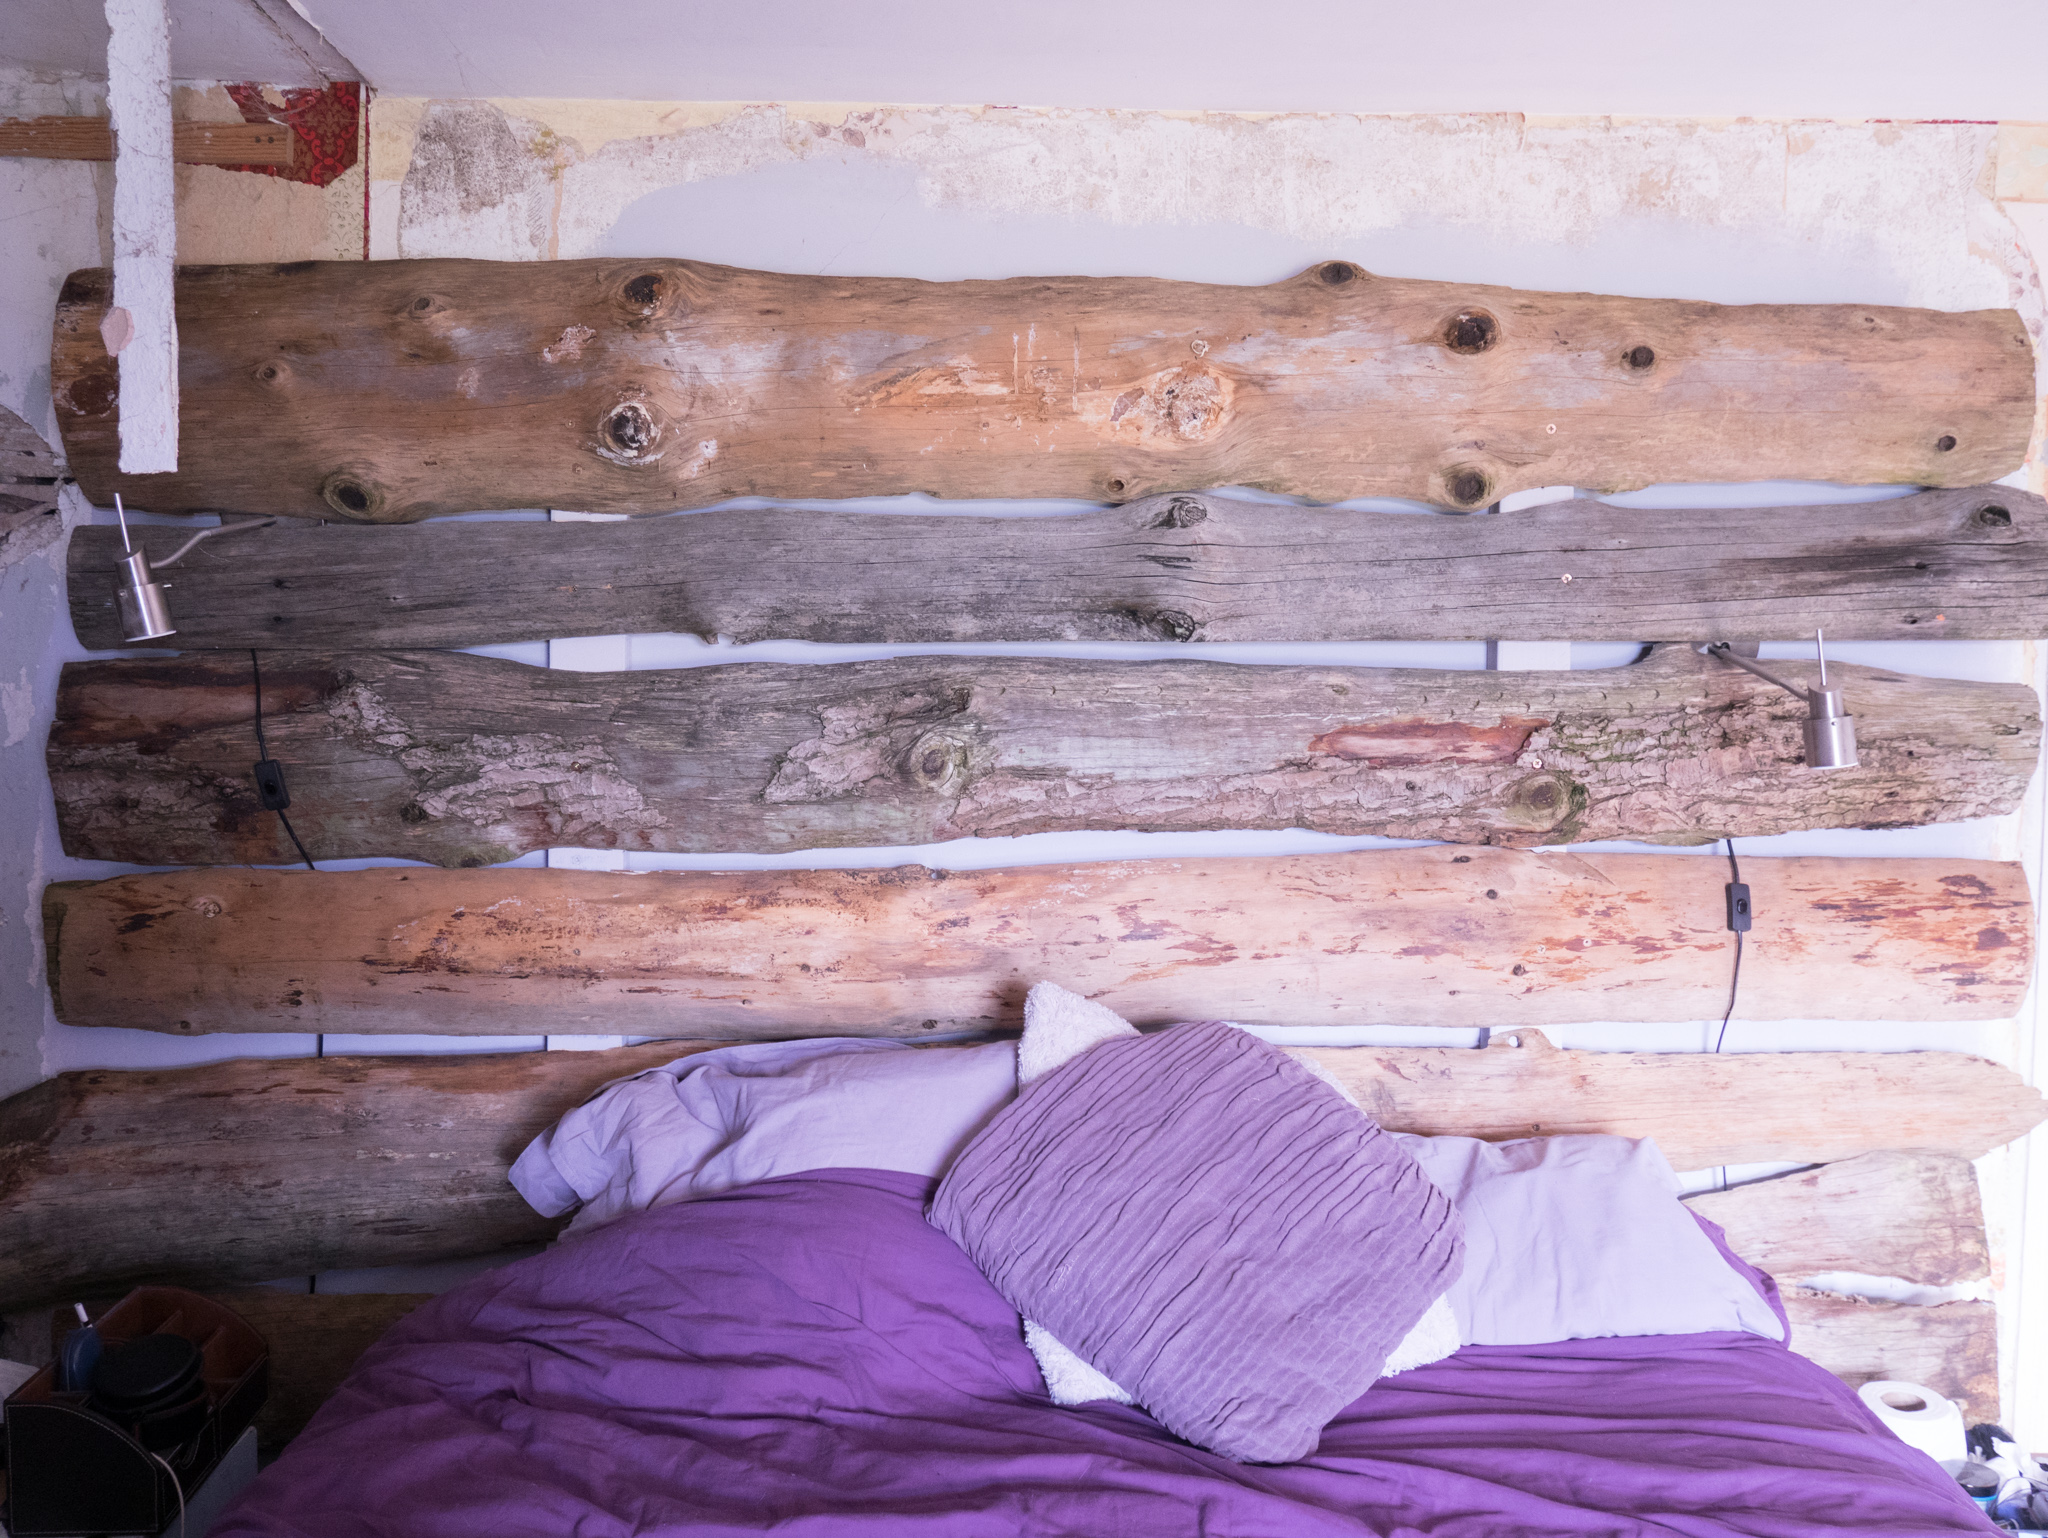
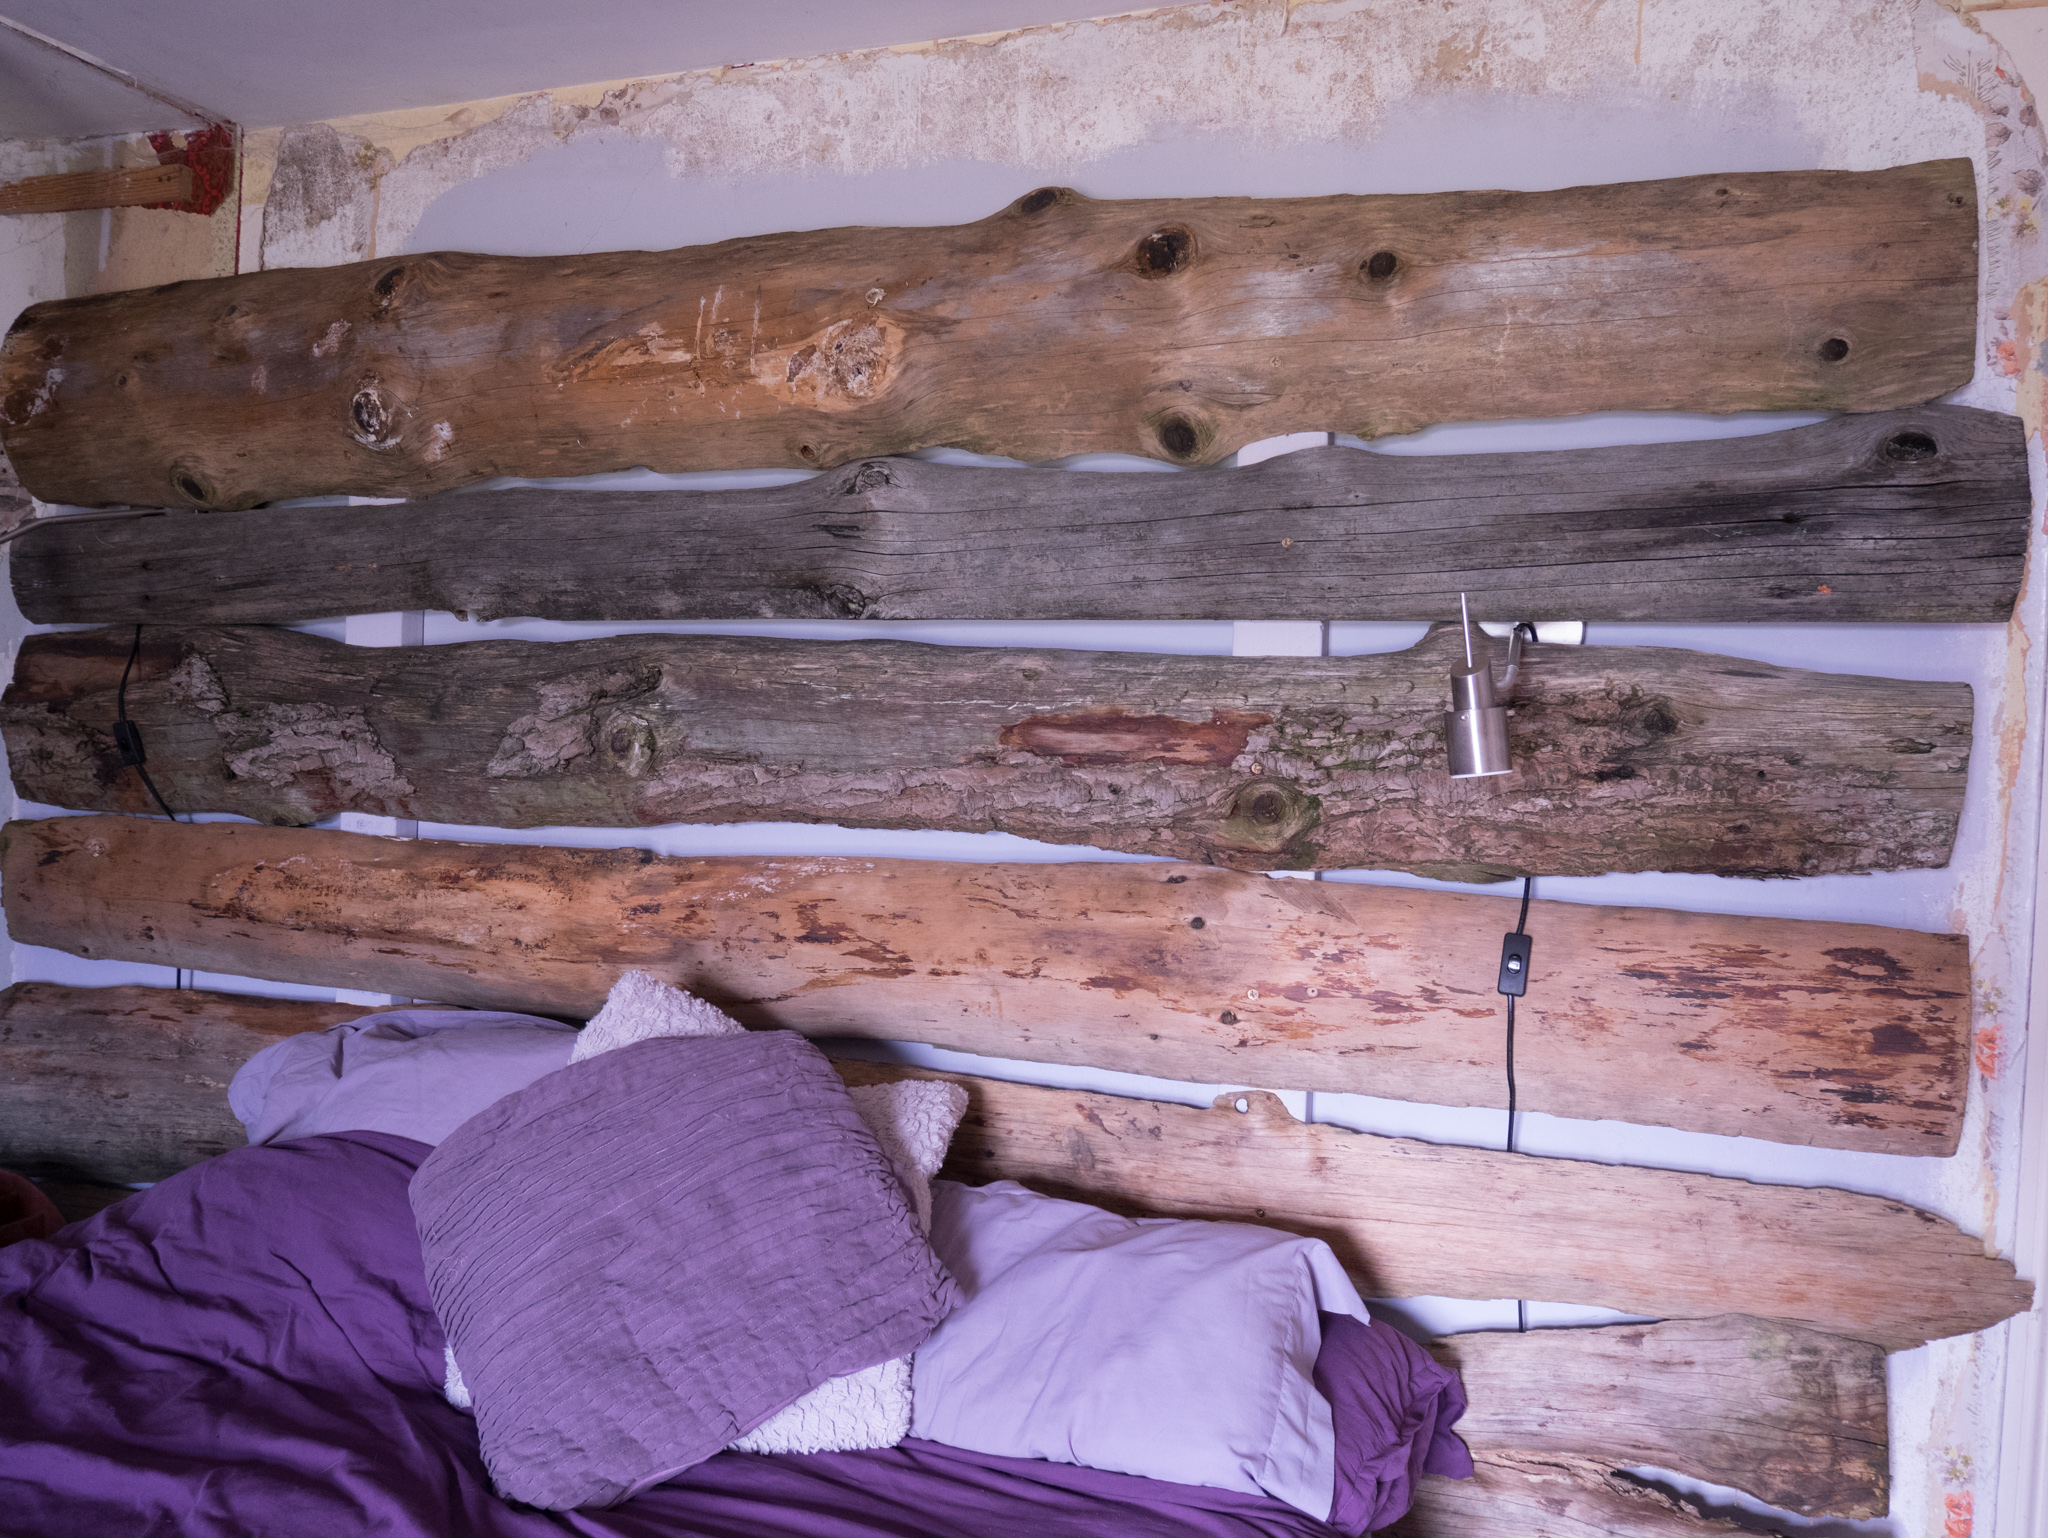
Here’s a list of what still needs to be done: Plasterboard the ceiling where the built-in furniture was; plaster the side wall where the built-in furniture was; finish scraping the wallpaper off round the edges; properly uncover the fireplace; block it up and put in an electric fake log-burner for now; buy nice bed-side cabinets; buy a blanket box for Chris to keep his trousers and jumpers in; paint the other walls (though we’re wondering whether to leave some bare) and make a very wide skirting board to cover the floor-wall gap. Also general tidying as we still have two small boxes in there that haven’t been unpacked since we moved eight years ago. So, I’ll keep you updated as we go. By the way, I have ordered some fairy lights, so in part two the room might look a little prettier. And have you noticed that our old bed-side lamps cleverly slot between the planks now? I have to say I rather like that!
Let me know if you have any renovating projects in the works and how you’re getting on.

